
Let me explain. My husband has always been fascinated by hot-glass work. A few months ago I was searching online for Chicago area glass-blowing studios and came up with a place out of Highland Park called Making Glass. Right on the studio's front page was a link for demonstrations and glass-blowing parties. After multiple discussions with the people at Making Glass, we decided to move forward with a hands-on demonstration and invited a few of our friends along.
Having watched demonstrations before, I wasn't surprised at the requirements that we wear natural-fiber clothing and closed-toe shoes. But still, the liability waiver was a little intimidating. This was going to be serious hands-on stuff.
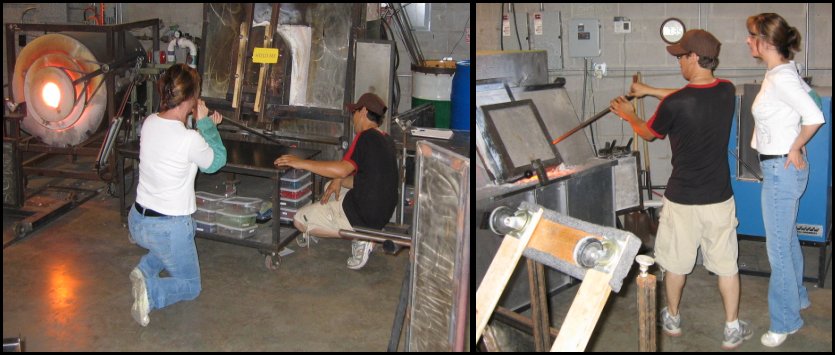
At the studio on Saturday, we were introduced to Joe, one of the artists and instructors, and given our lecture on safety. The furnaces would be extremely hot. We'd need to drink a lot of water while in the studio to keep hydrated. Don't pick up any glass off the floor because it could still be hot. Use common sense when handling equipment. And, by the way, after years of working with the hot glass, Joe doesn't have much sensation left in his hands and arms.
Several of us became convinced that we'd forget ourselves and accidentally touch the hot part of a pole, but we were all determined to try it anyway. After Joe did a 20-minute or so demonstration on how to make a glass tumbler, the hands-on part of the evening started. With another instructor, Andy, and an assistant, we divided into groups and worked on the tumblers two at a time - one person with Joe and one with Andy.
In the photos below, you can see some of the process of making a tumbler. Click on the photos if you want to see them in greater detail. It took us each about 15-20 minutes. No one was injured. No glass was broken. It was a fascinating experience.
 First, we used the pipe to gather clear glass from the furnace. I did the first gather myself (not pictured), then we brought the pipe over to the table and blew a bubble into the glass (above-left). After we had a nice bubble (only about an inch or so in diameter), we went back to the furnace to gather more glass. The second time (above-right), I let Andy do the gather. (Even though I had a protective sleeve on my right arm, when I did the first gather, my left arm felt a little singed and I didn't feel the need to prove myself again.)
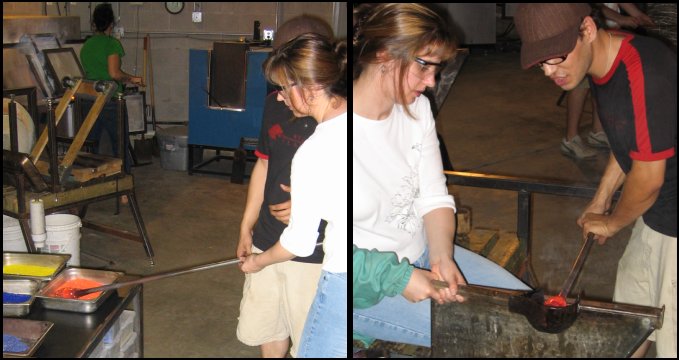
After the second gather, we took the pipe with the clear wad of molten glass on it and rolled it in a bin of colored glass bits (above-left). The glass bits pretty much looked like aquarium gravel, and melted quickly into the molten glass. The interesting thing was that once the glass got hot, it all looked orange, regardless of what color it really was. Once we had all the color, we used a wet wooden mold to shape the glass into a ball (above-right).
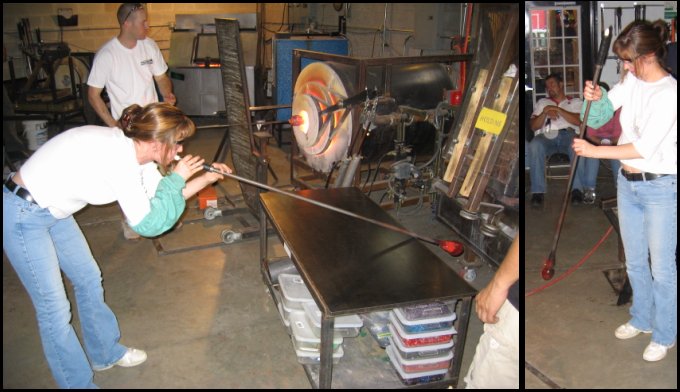 Next, we blew more air into the glass to increase the size of the bubble. Then we swung the pipe in a pendulum motion to elongate the ball. (In the picture above-left, notice that Joe is in the background at one of the furnaces. He was helping someone else make their tumbler, and because the glass cools as you're working with it, every once in a while they'd bring it over to the furnace and reheat the glass just enough to keep it liquid but not lose its shape.)
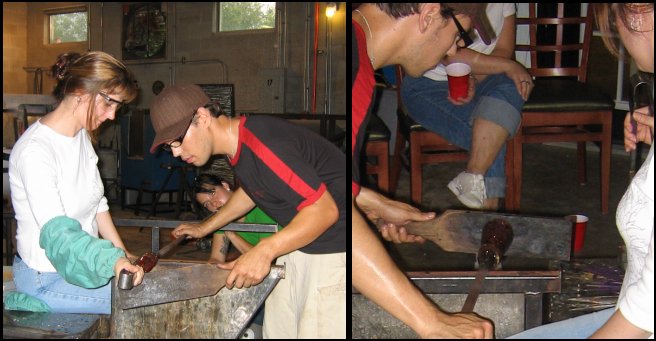 As Andy helped me roll, I used the jacks to smooth and shape the outside of the bubble, while the assistant blew more air into it (above-left). At some point, we used the jacks to put a crease in the glass at the location that would eventually be the top of the tumbler (not shown). When the glass was at the desired shape and size, Andy used a wet, wooden paddle to flatten the bottom of the bubble (above-right). The flattened end would become the bottom of our tumbler. (Notice that in the picture above-right, the woman's leg in the background looks a little distorted. It took me a minute to realize why, but on close inspection it's the heat waves radiating off the glass.)
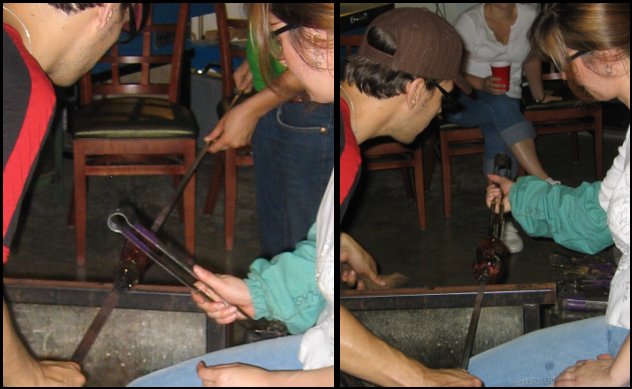
The next steps get a little tricky to explain. After the bottom was flattened, the assistant took a pipe with a small blob of hot glass on it, and we attached it to the flattened bottom of the glass ball. Using water to cool the depression we'd made earlier, we used the jacks to tap the pipe (above-left). This broke the glass at the depressed area.
We had successfully transferred the glass to another pipe, and where it had broken we now had an opening that would become the mouth of our tumbler. After heating the glass again, we then used the jacks to widen the mouth of the tumbler. Above-right, the tumbler is almost finished. Andy then used more water to detach the pipe from the glass, and the glass was placed in a special cabinet to gradually cool the over the next 14 hours. (If the glass cools too quickly, it breaks.)
That was pretty much the process, give or take a few manipulations of the glass.
I was the last to go, and by the time I finished, we'd been there at least three hours. We were all on a high, and guzzling tons of water. It was so much fun. Several people were almost ready right then and there to sign up for a class. It'll probably happen, too.
I'm going to pick up the finished glasses in a little while. I'll post picture of them. Stay tuned.
No comments:
Post a Comment
Hi! Feel free to leave a comment. You do your part, and I'll try to keep the conversation going.